# react简书项目
react 高效/最小页面化重绘/单向数据流/组件化/ 声明式
- 声明式:在哪做什么,不需要知道怎么实现
- 编程式:在哪做什么,怎么做到的
# react组件
# 组件的定义
- ReactDOM:用于将模板转为 HTML 语言,并插入指定的 DOM 节点,把组件挂载到dom节点上
- React.createClass 方法就用于生成一个组件类
- 组件类第一个字母必须
大写,且必须有render函数 - JSX允许 HTML 与 JavaScript 的混写
- JSX 的基本语法规则:遇到 HTML 标签(以 < 开头),就用 HTML 规则解析;遇到代码块(以 { 开头),就用 js 规则解析
 import React, { Component} from 'react';
 class App extends Component {
	 constructor(props) {
	   super(props)
	   //组件的状态,如果不是视图需要的元素,不必一定要写在这里,可以单独写。如下定时器
	 	this.state={
	 	}
		// 这样可以让state尽可能精简
		this.timer =null
	 }
 }
- jsx语法引入的组件要大写,否则无法识别:比如自定义的Fun组件
 The tag <fun> is unrecognized in this browser. If you meant to render a React component,
 start its name with an uppercase letter.
import React from 'react';
import ReactDOM from 'react-dom';
import App from './App';
ReactDOM.render(<App />, document.getElementById('root'));
//这里引入React的原因是解析jsx语法
# react组件类型
- 函数组件
- 函数组件:通常无状态,仅关注内容展示,返回渲染结果。不需要生命周期和状态,一般是个傻瓜式组件,在v16.8版本之后支持hooks,函数组件也能够拥有状态
- 利用 usestate和useEffect 实现部分数据和生命周期功能
- 可以把 useEffect Hook 看做 componentDidMount , componentDidUpdate 和 componentWillUnmount 这三个函数的组合
- 类组件
- 类组件,通常是有状态组件,还可以分Component和PureComponent,PureComponent自身集成了shouldComponentUpdate.
类组件状态state的变化:
WARNING
● setState方法作用
- 修改state中的数据状态
- 更新UI
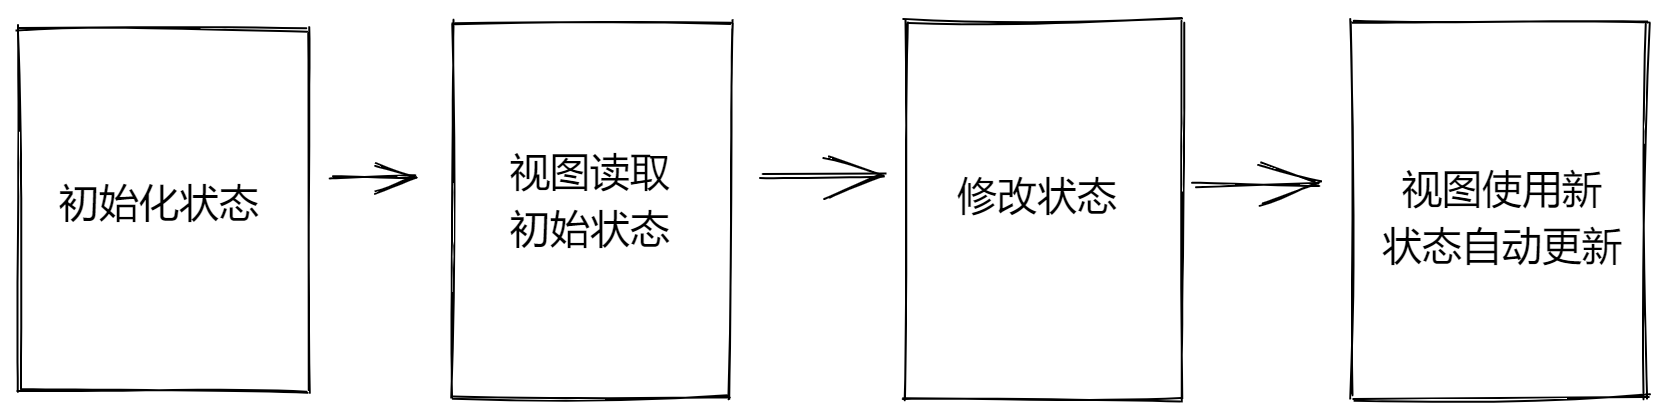
● 思想:数据驱动视图,也就是只要修改数据状态,那么页面就会自动刷新,无需手动操作dom
● 注意事项: 不要直接修改state中的值,必须通过setState方法进行修改
import React, {  useState, useEffect } from 'react';

export default function FunctionComponent() {
	const [date, setDate] = useState(new Date());
	 // console.log(1)
	 useEffect(() => {
	 // console.log(2) //useEffect第二个参数设为空数组,那么就没有依赖,就只改变一次,否则会一直重复设置timer
	 // 而实际上timer只要自己执行一次,后面就每隔一秒自动setDate就好了,如果没有设置好依赖项,
	 //每隔一秒都会执行一次console.log(2),然后再执行生成一个timer,这是完全没有必要的
	 const timer = setInterval(() => {
	 setDate(new Date());
	 }, 1000);
	 return () => clearInterval(timer);//组件卸载的时候执行,这个return函数相当于 componentWillUnmount
	 }, []);// 第二个参数是依赖更新项,相当于 componentDidUpdate

	return (<div>
		 <h3>FunctionComponent</h3>
		 <p>{date.toLocaleTimeString()}</p>
		 </div>)
}
类组件的写法:class组件通常拥有状态和生命周期,继承于Component,实现render方法。
import React, { Component } from "react";
export default class ClassComponent extends React.Component {
	 constructor(props) {
		 super(props);
		 this.state = { date: new Date() };
	 }
	 componentDidMount() {
		 this.timerID = setInterval(() => {
			  this.setState({
				date: new Date()
			  });
		  }, 1000);
	}
	componentWillUnmount() {
		clearInterval(this.timerID);
	}
	componentDidUpdate() {
		console.log("componentDidUpdate");
	}
	render() {
		return <div>{this.state.date.toLocaleTimeString()}</div>;
	}
}
# react组件间通信
- 父组件向子组件传递
- 子组件向父组件传递
- 兄弟组件之间的通信
- 父组件向后代组件传递: React.createContext() || useContext ,Context 提供了一种在组件之间共享值而无需显式地通过每一层组件传递 props 的方式
- 非关系组件传递:redux
// 兄弟组件借助父组件为中间层
class Parent extends React.Component {
  constructor(props) {
    super(props)
    this.state = {count: 0}
  }
  setCount = () => {
    this.setState({count: this.state.count + 1})
  }
  render() {
    return (
      <div>
        <SiblingA
          count={this.state.count}
        />
        <SiblingB
          onClick={this.setCount}
        />
      </div>
    );
  }
}
# context类组件和函数组件的使用
import React,{Component} from 'react'
import P1 from './P1.js'
export const MyContext = React.createContext();

export default class G1 extends Component{
    constructor(props){
        super(props)
        this.state ={val:10}
    }
    componentDidMount(){
        setTimeout(() => {
            this.setState({val:this.state.val+1})
        }, 2000);
    }
    render(){
        return (<div>
            <MyContext.Provider value={this.state.val}>
                <P1/>
            </MyContext.Provider>
        </div>)
    }
}
import React,{Component} from 'react'
import C1 from './C1.js'
import C2 from './C2.js'
export default class P1 extends Component{
    render(){
        return (<div>
            <C1 />
            <C2/>
        </div>)
    }

}
import React,{Component} from 'react'
import { MyContext } from './G1'
export default class C1 extends Component{
    render(){
        return (<div>
            <MyContext.Consumer>
                {value => <div>{value}222</div>}
            </MyContext.Consumer>
        </div>)
    }

}
import React, { useContext } from 'react';
import { MyContext } from './G1'

export default function C2() {
  const value = useContext(MyContext);
  // 使用 value 来渲染组件
  return value;
}
# jsx语法和dangerouslySerInnerHMTL
render的返回html内容不需要加引号- jsx注释的写法
- label中的for要改成
htmlFor,标签上的class要改成className dangerouslySetInnerHTML可以不让标签转义,如h1就变成了大写,而不是展示h1,但是有风险; __html :双下划线
 render(){
 	return(
	{/*注释的写法*/}
	{
	//注释单行
	}
 	<Fragment>
 		<div>
 				<label htmlFor="doinput">label</label>
 				<input
 				id="doinput"
 				className="input"
 				value={this.state.inputvalue}
 				onChange={this.inputclick.bind(this)}
 				/>
 				<button onClick={this.btnclick.bind(this)}>提交</button>
 		</div>
 		<ul>
 			{this.state.list.map((el,i)=>{
 				return <li
 								key={i}
 								onClick={this.deleteli.bind(this,i)}
 								dangerouslySetInnerHTML={{__html:el}}
 								></li>
				{/*注意dangerouslySerInnerHMTL的语法*/}
 			})}
 		</ul>
 	</Fragment>
 	)
 }
function createMarkup() {
  return {__html: 'First · Second'};
}

function MyComponent() {
  return <div dangerouslySetInnerHTML={createMarkup()} />;
}
{ JS 表达式 }
- 可以使用的表达式
- 字符串、数值、布尔值、null、undefined、object( [] / {} )
- 1 + 2、'abc'.split('')、['a', 'b'].join('-')
- fn()
- JSX列表渲染:
songs.map(item => <li>{item.name}</li> - JSX条件渲染:三元运算符 或 逻辑与(&&)运算符, 如果分支较多,可以考虑将判断逻辑收敛到一个函数中,保证模板简减 。
注意
if 语句/ switch-case 语句/ 变量声明语句,这些叫做语句,不是表达式,不能出现在 {} 中!!
# JSX样式处理
- 行内样式 - style
function App() {
  return (
    <div className="App">
      <div style={{ color: 'red' }}>this is a div</div>
    </div>
  )
}

export default App
或者提取出来成一个对象
const styleObj = {
    color:red
}

function App() {
  return (
    <div className="App">
      <div style={ styleObj }>this is a div</div>
    </div>
  )
}

export default App
- 类名 - className(推荐)
.title {
  font-size: 30px;
  color: blue;
}
import './app.css'
const showTitle = true
function App() {
  return (
    <div className="App">
      <div className={ showTitle ? 'title' : ''}>this is a div</div>
    </div>
  )
}
export default App
- css Module
当不想被 全局污染样式 可采用css模块化开发,脚手架已经自带这个功能,编写的文件
a.moudle.css命名即可
import React from 'react'
import styles from './demo2.module.css'
export default class TodoApp extends React.Component {
    render() {
      return (
        <div className={styles.k1}>2222</div>
      )
    }
}
# react默认事件阻止
e.preventDefault();
// 阻止事件冒泡
e.stopPropagation();
# react响应式设计思想和事件绑定
Fragment =>占位符
onChange=>在react中事件要驼峰写
不可以直接修改state状态的数据,需要使用setState来修改
如何绑定事件
- 语法: on + 事件名称 = { 事件处理程序 } ,比如:
<div onClick={ onClick }></div> - 注意点: react事件采用驼峰命名法,比如:onMouseEnter、onFocus
- 语法: on + 事件名称 = { 事件处理程序 } ,比如:
 import React,{Component,Fragment} from "react"
 class App extends Component{
 	constructor(props) {
 	  super(props)
 		this.state={
 			inputvalue:"",
 			list:["react"]
 		}
 	}
 	render(){
 		return(
 		<Fragment>
 			<div>
 					<input value={this.state.inputvalue} onChange={this.inputclick.bind(this)}/>
 					<button onClick={this.btnclick.bind(this)}>提交</button>
 			</div>
 			<ul>
 				{this.state.list.map((el,i)=>{
 					return <li key={i} onClick={this.deleteli.bind(this,i)}>{el}</li>
 				})}
 			</ul>
 		</Fragment>
 		)
 	}
 	inputclick(e){
 		console.log(e.target.value)
 		this.setState({
 			inputvalue:e.target.value
 		})
 	}
 	btnclick(e){
 		this.setState({
 		//list:this.state.list.push(e.target.value) 错误的,改变了list原来的值,要用this.setState设置list
 				list:[...this.state.list,this.state.inputvalue],
 				inputvalue:""
 		})
 	}
 	deleteli(i){
		// 删除操作需要保留一个副本,在副本上进行操作
 		let temarr=[...this.state.list];
		//不要直接更改state(vuex)
 		temarr.splice(i,1)
 		// alert(this.state.list)
 		this.setState({
 			list:temarr
 		})
 	}
 }
 export default App
# 为什么调用方法要 bind this
class Foo {
  sayThis () {
    console.log(this); // 这里的 `this` 指向谁?
  }

  exec (cb) {
    cb();
  }

  render () {
    this.exec(this.sayThis);
  }
}

var foo = new Foo();
foo.render(); // undefined
为什么React没有自动的把 bind 集成到 render 方法中呢?在 exec 调用回调的时候绑定进去,像这样:
class Foo {
  sayThis () {
    console.log(this); // 这里的 `this` 指向谁?
  }

 exec (cb) {
   cb.bind(this)();
 }

 render () {
   this.exec(this.sayThis);
 }
}

var foo = new Foo();
foo.render(); // Foo
因为 render 多次调用每次都要 bind 会影响性能,所以官方建议自己在 constructor 中手动 bind 达到性能优化。
# react解决thisbind的问题方法
- 直接 bind this 型 缺点:性能不太好,这种方式跟 react 内部帮 bind 一样的,每次 render 都会进行 bind,而且如果有两个元素的事件处理函数是同一个,也还是要进行 bind,这样会多写点代码,而且进行两次 bind,性能不是太好。
<button onClick={this.handleClick.bind(this)}>
	Click me
  </button>
- constuctor 手动 bind 型
class Foo extends React.Component {
  constuctor(props) {
    super(props)
    this.handleClick = this.handleClick.bind(this)
  }
  handleClick () {
    this.setState({ xxx: aaa })
  }

  render() {
    return (
      <button onClick={this.handleClick}>
        Click me
      </button>
    )
  }
}
- 箭头函数 缺点: 每次 render 都会重复创建函数,性能会差一点。
class Foo extends React.Component {
  handleClick () {
    this.setState({ xxx: aaa })
  }

  render() {
    return (
      <button onClick={(e) => this.handleClick(e)}>
        Click me
      </button>
    )
  }
}
- public class fields 型(实验阶段)
class Foo extends React.Component {
  handleClick = () => {
    this.setState({ xxx: aaa })
  }

  render() {
    return (
      <button onClick={this.handleClick}>
        Click me
      </button>
    )
  }
}
- 以上四种写法传递参数
class IndexPage extends React.Component{
  constructor(props) {
    super(props)

    this.event1 = this.event1.bind(this, 1);
  }

  event1(a, e) {
    console.log('event1', a, e);    // 1 {}
  }
  event2(a, e) {
    console.log('event2', a, e);    // 2 {}
  }
  event3(a, e) {
    console.log('event3', a, e);    // 3 {}
  }
  event4 = (e) => {
    console.log('event4', e);       // {}
  }

  render() {
    return (
      <div>
        <button onClick={ this.event1 }>event1</button>
        <button onClick={ (e) => { this.event2(2, e) } }>event2</button>
        <button onClick={ this.event3.bind(this, 3) }>event3</button>
        <button onClick={ this.event4 }>event4</button>
      </div>
    );
  }
}
提示
- event1方式可以在bind时传入自定义的参数,在最后会补上event参数。
- event2方式由于显示的传参,所以他需要显示的传入event参数。
- event3方式同event1一致,但是可以传入在render中获取或计算后的参数。
- event4方式没法传入自定义参数,可以拿到event参数,如果利用高阶函数,也可以传递参数。
import React from "react"
// 如何获取额外的参数?
// onClick={ onDel } -> onClick={ () => onDel(id) }
// 注意: 一定不要在模板中写出函数调用的代码 onClick = { onDel(id) }  bad!!!!!!
const TestComponent = () => {
  const list = [
    {
      id: 1001,
      name: 'react'
    },
    {
      id: 1002,
      name: 'vue'
    }
  ]
  const onDel = (e, id) => {
    console.log(e, id)
  }
  return (
      <ul>
        {list.map(item =>(
           <li key={item.id}>
                {item.name}
                <button onClick={(e) => onDel(e, item.id)}>x</button>
           </li>
        ))}
      </ul>
  )
}

function App () {
  return (
    <div>
      <TestComponent />
    </div>
  )
}
export default App
由于event2和event3方式是在使用时返回event实例,对性能有影响,所以在没有参数要传时不建议使用,又由于event1需要额外写代码,所以推荐使用event4这种方式。当需要传参数时,可考虑其他方法,也可以使用高阶函数返回带参函数处理。
参考资料 (opens new window) 官网参考资料 (opens new window) bind (opens new window) react事件绑定和传参 (opens new window)
# react constructor props
- 如果直接去操作react父组件传递的props,系统会直接报错
ncaught TypeError: Cannot assign to read only property 'give' of object '#<Object>'
//无法分配给对象的只读属性'give'
import React,{Component} from 'react'
export default class Cc extends Component{
	constructor(arg) {
		super()
	    console.log(this)
		this.state={a:1999}
	}
	componentWillMount(){
		this.props.give=1111
	}

}
- 当在子组件的constructor中,用this.porps拿不到父组件传递的值,不过子组件的constructor的参数实际上就是props,在componentDidMount中可以用this.props拿到对应的父组件返回的值
//父组件
import './App.css';
import C from './views/c.js'
function App() {
  return (
    <div className="App">
      <header className="App-header">
	  <C give='foryou'/>
      </header>
    </div>
  );
}
export default App;
//c.js
import React,{Component} from 'react'

export default class Cc extends Component{
	constructor(props) {
		console.log(props)//{give: 'foryou'}
		// 不建议使用 super() 代替 super(props)
		super()
	    console.log(this.props)//undefined
		// 因为在 React 会在类组件构造函数生成实例后再给 this.props 赋值,所以在不传递 props 在 super 的情况下,调用 this.props 为 undefined
		this.state={a:1999,b:''}
	}
	componentWillMount(){
		this.setState(()=>{
			return{
				b:this.props.give+'xxxxx'
			}
		})
	}
	componentDidMount(){
		console.log(this.props)//{give: 'foryou'}
	}
	render(){
		return <div>react01{this.props.give}----{this.state.b}</div>
	}
}
而传入 props 的则都能正常访问,确保了 this.props 在构造函数执行完毕之前已被赋值,更符合逻辑
class Button extends React.Component {
  constructor(props) {
    super(props); // 没传入 props
    console.log(props);      //  {}
    console.log(this.props); //  {}
    // ...
  }
}
# 函数组件的props
function Avatar({ person, size }) {
  return (
    <img
      className="avatar"
      src={getImageUrl(person)}
      alt={person.name}
      width={size}
      height={size}
    />
  );
}
使用 JSX 展开语法传递 props 有时候,传递 props 会变得非常重复:
function Profile({ person, size, isSepia, thickBorder }) {
  return (
    <div className="card">
      <Avatar
        person={person}
        size={size}
        isSepia={isSepia}
        thickBorder={thickBorder}
      />
    </div>
  );
}
重复代码没有错(它可以更清晰)。但有时你可能会重视简洁。一些组件将它们所有的 props 转发给子组件,正如 Profile 转给 Avatar 那样。因为这些组件不直接使用他们本身的任何 props,所以使用更简洁的“展开”语法是有意义的:
function Profile(props) {
  return (
    <div className="card">
      <Avatar {...props} />
    </div>
  );
}
这会将 Profile 的所有 props 转发到 Avatar,而不列出每个名字。
请克制地使用展开语法。 如果你在所有其他组件中都使用它,那就有问题了。
# react祖辈组件传递给孙辈
<Children {...props}></Children>
const Children = (props) =>{
  return(
    <div >2222---{props.a}</div>
  )
}

const Home = (props) => {
  // 执行函数
  console.log(props)
  const navigate = useNavigate()
  return (
    <div>
      <Children {...props}></Children>
    </div>
  )
}
# react props.children
每个组件都可以获取到 props.children。它包含组件的开始标签和结束标签之间的内容。
根据需求也可以自己去增加渲染条件
function ConditionalChildComponent(props) {
  if (props.shouldShowChildren) {
    return <div>{props.children}</div>;
  }
  return <div>No children to show.</div>;
}

// 使用
<ConditionalChildComponent shouldShowChildren={true}>
  <p>This will be shown.</p>
  {/* //根据需求通过props.children进行渲染 */}
</ConditionalChildComponent>
# react组件复合Composition
- 复合组件更敏捷的方式定义组件的外观和行为,比起继承的方式它更明确和安全
- 复用代码,根据功能可以控制显示和隐藏
- 类似vue插槽
- Layout.js
import React, { Component } from "react";
export default class Layout extends Component {
  componentDidMount() {
    const { title = "商城" } = this.props;
    document.title = title;
  }
  render() {
    const { children} = this.props;
    return (
      <div>
        {this.props.children}
      </div>
    );
  }
}
- HomePage.js
import React, { Component } from "react";
import Layout from "./Layout";

export default class HomePage extends Component {
  render() {
    return (
      <Layout title="商城首页">
        <div>
          <h3>HomePage</h3>
        </div>
      </Layout>
    );
  }
}
# React.Children.map
this.props.children 的值有三种可能:
- 如果当前组件没有子节点,它就是 undefined ;
- 如果有一个子节点,数据类型是 Object;
- 如果有多个子节点,数据类型就是 Array。
- 如果只是展示,皆可以使用this.props.children展示,假如要变更标签等,可借助api React. Children.map
//val为值,key为index
React.Children.map(this.props.children,function(val,key){
	return <li>{val}---{key}</li>
})
类似vue具名插槽,this.props.children.xxx1,this.props.children.xxx2等等
- Layout.js
import React, { Component } from "react";
import TopBar from "../components/TopBar";
import BottomBar from "../components/BottomBar";

export default class Layout extends Component {
  componentDidMount() {
    const { title = "商城" } = this.props;
    document.title = title;
  }
  render() {
    const { children, showTopBar, showBottomBar } = this.props;
    console.log("children", children);
    return (
      <div>
        {showTopBar && <TopBar />}
        {children.content}
        {children.txt}
        <button onClick={children.btnClick}>button</button>
        {showBottomBar && <BottomBar />}
      </div>
    );
  }
}
- HomePage.js
import React, { Component } from "react";
import Layout from "./Layout";

export default class HomePage extends Component {
  render() {
    return (
      <Layout showTopBar={false} showBottomBar={true} title="商城首页">
        {{
          content: (
            <div>
              <h3>HomePage</h3>
            </div>
          ),
          txt: "这是个文本",
          btnClick: () => {
            console.log("btnClick");
          }
        }}
      </Layout>
    );
  }
}
# 组件的拆分和传值
//父组件
import React,{Component,Fragment} from "react"
import ToDisplay from "./ToDisplay"
import './style.css'

class App extends Component{
	constructor(props) {
	  super(props)
		this.state={
			inputvalue:"",
			list:["react"]
		}
	}
	//当父组件的render函数被重新运行的时候,子组件的render函数也会重新运行
	//当组件的state或者props发生变化是,render函数会被重新执行(可考虑不必要重新执行时的优化)
	render(){
		return(
		<Fragment>
			<div>
					<label htmlFor="doinput">label</label>
					<input
					id="doinput"
					className="input"
					value={this.state.inputvalue}
					onChange={this.inputclick.bind(this)}
					/>
					<button onClick={this.btnclick.bind(this)}>提交</button>
			</div>
			<ul>
				{this.state.list.map((el,i)=>{
					return <ToDisplay
									content={el}
									index={i}
									deleteli={this.deleteli.bind(this)}
									/>
				})}
			</ul>
		</Fragment>
		)
	}
	inputclick(e){
		console.log(e.target.value)
		this.setState({
			inputvalue:e.target.value
		})
	}
	btnclick(e){
		this.setState({
				list:[...this.state.list,this.state.inputvalue],
				inputvalue:""
		})
	}
	deleteli(i){
		let temarr=[...this.state.list];
		temarr.splice(i,1)
		// alert(this.state.list)
		this.setState({
			list:temarr
		})
	}
}
export default App
子组件可以通过自身的方法,去触发父组件通过porps传递过来的方法
//子组件
import React from 'react'
class ToDisplay extends React.Component{
	render(){
		return(
			<li  onClick={this.deleteitem.bind(this)}>{this.props.content}</li>
		)
	}
	deleteitem(){
		this.props.deleteli(this.props.index)
	}
}
export default ToDisplay
- 父组件修改了bind的指向,如果这个函数又需要在子组件中传递参数,可以写成箭头函数的显示或者绑定this
//子组件
import React from 'react'
class ToDisplay extends React.Component{
	render(){
		return(
			<li  onClick={
				this.props.deleteli.bind(this,this.props.index)
			}>{this.props.content}</li>
		)
	}
}
export default ToDisplay
//子组件
import React from 'react'
class ToDisplay extends React.Component{
	render(){
		return(
			<li  onClick={()=>{
				this.props.deleteli(this.props.index)
			}}>{this.props.content}</li>
		)
	}
}
export default ToDisplay
总结
- 父子组件,父组件以属性的形式传值给子组件,包括父组件的方法都能传递
- 父组件的方法传给子组件,要注意改变this的指向
- 子组件接受父组件的方法或者属性,要用props来接收,就可以正常使用
# react受控组件和非受控组件
- 什么是受控组件? input框自己的状态被React组件状态控制
受控组件(Controlled Component)是指那些受 React 控制的表单元素,其状态(
value、checked 等属性)的变更由组件的state管理。从而保证单一数据源特性。
# 实现步骤
以获取文本框的值为例,受控组件的使用步骤如下:
- 在组件的state中声明一个组件的状态数据
- 将状态数据设置为input标签元素的value属性的值
- 为input添加change事件,在事件处理程序中,通过事件对象e获取到当前文本框的值(即用户当前输入的值)
- 调用setState方法,将文本框的值作为state状态的最新值
import React from 'react'

class InputComponent extends React.Component {
  // 声明组件状态
  state = {
    message: 'this is message',
  }
  // 声明事件回调函数
  changeHandler = (e) => {
    this.setState({ message: e.target.value })
  }
  render () {
    return (
      <div>
        {/* 绑定value 绑定事件*/}
        <input value={this.state.message} onChange={this.changeHandler} />
      </div>
    )
  }
}


function App () {
  return (
    <div className="App">
      <InputComponent />
    </div>
  )
}
export default App
class MulSelect extends React.Component {
 constructor(props) {
  super(props);
  this.state = { values: [] };
  this.handle = this.handle.bind(this);
 }
 handle(e) {
  const { options } = e.target; //options 是一个类数组对象
  const values = Object.keys(options) //将 options 的索引组成一个数组
    .filter(i => options[i].selected) //过滤出选中项
    .map(i => options[i].value); //提取选中项组成新数组
  this.setState({ values });
 }
 render() {
  return (
  <select value={this.state.values} onChange={this.handle} multiple={true}>
    <option value="1">strick</option>
    <option value="2">freedom</option>
    <option value="3">jane</option>
  </select>
  );
 }
}
- 什么是非受控组件?
- 非受控组件就是通过手动操作dom的方式获取文本框的值,文本框的状态不受react组件的state中的状态控制,直接通过原生dom获取输入框的值
- this.msgRef.current.value获取值需要在createRef创建的实例上拿到current.value
# 实现步骤
- 导入createRef 函数
- 调用createRef函数,创建一个ref对象,存储到名为msgRef的实例属性中
- 为input添加ref属性,值为msgRef
- 在按钮的事件处理程序中,通过msgRef.current即可拿到input对应的dom元素,而其中msgRef.current.value拿到的就是文本框的值
import React, { createRef } from 'react'

class InputComponent extends React.Component {
  // 使用createRef产生一个存放dom的对象容器
  msgRef = createRef()

  changeHandler = () => {
    console.log(this.msgRef.current.value)
  }

  render() {
    return (
      <div>
        {/* ref绑定 获取真实dom */}
        <input ref={this.msgRef} />
        <button onClick={this.changeHandler}>click</button>
      </div>
    )
  }
}

function App () {
  return (
    <div className="App">
      <InputComponent />
    </div>
  )
}
export default App
# react代码优化
- state部分可根据情况简写
 // constructor(props) {
    //     super(props);
    //     this.state = {
    //         count:0
    //     };
    // }

    state = {
        count:0
    }
- bindthis可以提前到constructor之中
- 可以把js逻辑单独提取出来成为函数
 constructor(props) {
   super(props)
 	this.state={
 		inputvalue:"",
 		list:["react"]
 	}
 	this.inputclick=this.inputclick.bind(this);
 	this.btnclick=this.btnclick.bind(this);
 	this.deleteli=this.deleteli.bin d(this);
 }
<ul>
	{this.getItem()}
</ul>
//需要return结果返回给jsx
getItem(){
		return this.state.list.map((el,i)=>{
					return <ToDisplay
							key={i}
							content={el}
							index={i}
							deleteli={this.deleteli}
							/>
				})

	}
- setstate新版支持函数写法,异步操作,如果拿不到值,需要先把值保存,再传给this.setState
- 子组件用解构赋值来代替繁琐的this.props.xxx
const value=e.target.value;
		this.setState(()=>{
			return{
				inputvalue:value
			}
		})
//react16推荐使用上面方法
// 		this.setState({
// 			inputvalue:e.target.value
// 		})
deleteitem(){
		const {deleteli,index}=this.props;
		deleteli(index);
}
- s代表上次修改数据前的state
this.setState((s)=>({
	//list:[...this.state.list,xxx]
	//<=====>
	list:[...s.list,xxx]
}))